|
VI. Draw/Edit/Delete
The Drawing/Editing tools are where you mark the archaeological features you see on the LiDAR images. As mentioned in Tutorial II: Application Layout - Drawing/Editing Tools, there are 3 Drawing tools and 2 Editing tools. This tutorial will go into greater detail on how to use each.
The general work flow for vectoring/drawing features is:
1. Locate assigned "survey square" (Tutorial III).
2. Turn on previously drawn features (Tutorial III).
3. Select Feature type (Tutorial VI).
3. Draw first feature.
4. Draw additional features.
5. Edit/Modify/Delete existing features.
6. Save vectors (Tutorial VII).
7. Submit vectors to CSS (Tutorial VIII).
For clarity and ease of use, only step 3 to 5 will be covered in this tutorial.
Below is a chart showing which Drawing Tool should be used for which Feature Type:
|
|
|
|
|
Tool
|
Feature
|
|
| Polyline
|
Channel, Walkway, Wall
|
| Polygon
|
Platform, Terrace
|
| Circlemaker
|
Earth Oven, Fort, Pit,
Star Mound, Stone Pile
|
|
|
|
|
Select - Draw / Edit / Delete for each Drawing tool to learn more, or slide down the page.
Drawing/Editing Tools Menu
|
|
|
A1.
|
Polyline
Draw
|
1. You start by enlarging a section of the map so that the archaeological features are plainly visible.
In this case, channels.
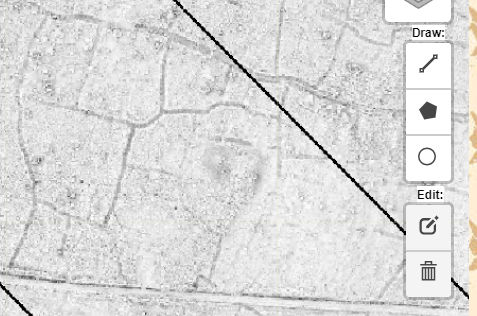
2. Click on the Polyline tool from the Draw tools menu (left mouse click).
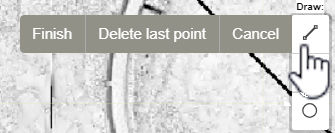
A menu appears. You can Cancel your selection or move the mouse to the left (onto the map) to begin. Move the mouse to the left.
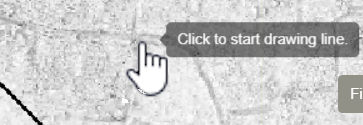
3. A message appears, prompting you to start a drawing. Move the mouse to the beginning of the feature you wish to record and click the left mouse button.
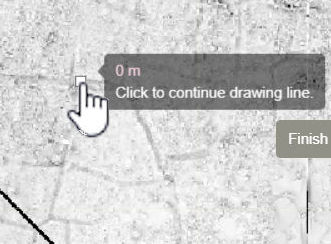
4. The message changes and your first point (white square) appears on the screen with distance = 0 m (meters) and a request to add another point.
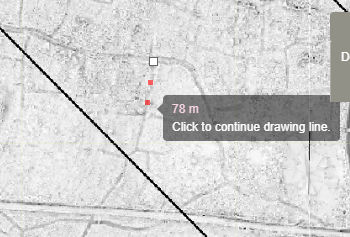
5. Now move the mouse down the screen across the channel you wish to draw. Notice the red squares and the distance (now 78 m)
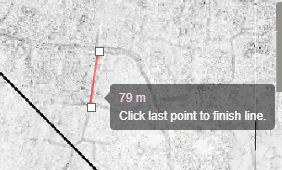
6. Click the mouse and a new point (white square) appears and the message prompts you to click that point to finish the line. You are not finished.
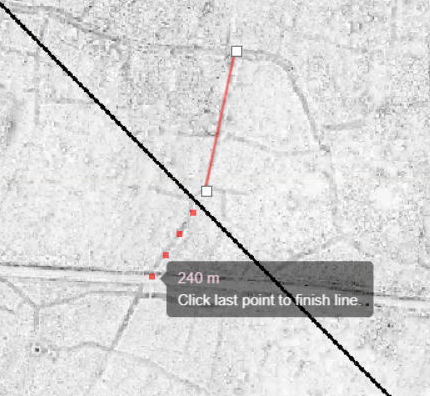
7. Continue moving along the channel, notice how the distance again increases (240 m). Click the left mouse button again to mark this part of the channel.
8. Continue along the channel repeating the steps above, clicking the left mouse button and marking the channel.
If a point is entered in error, simply use the Delete last point on the Draw menu to remove it (see Step 2 above).
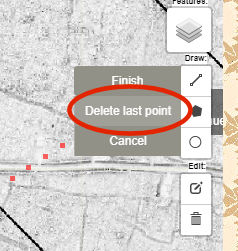
If you wish to Delete the entire feature/vector that you are still working on (has not been Finished (see step 9 & 10)) select Cancel to erase the unfinished feature.
9. You are at the end of the channel and the message prompts you again to "Click last point to finish line".
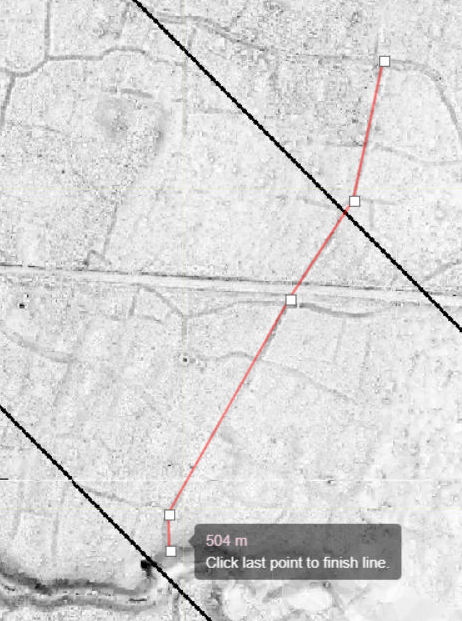
10. As you have finished marking this channel you click the last point (white square) to finish marking this channel. The first vector is complete and shows up as a red line on the LiDAR image and the points (white squares) have disappeared.
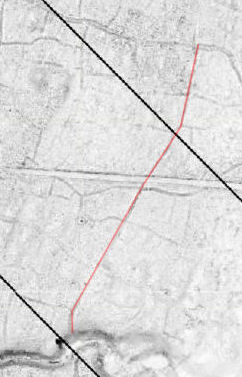
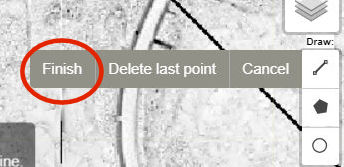
The vector can also be Finished (ended) by clicking the Finish button on the Polyline Draw menu.
11. You repeat the process above marking (vectoring) other channels.
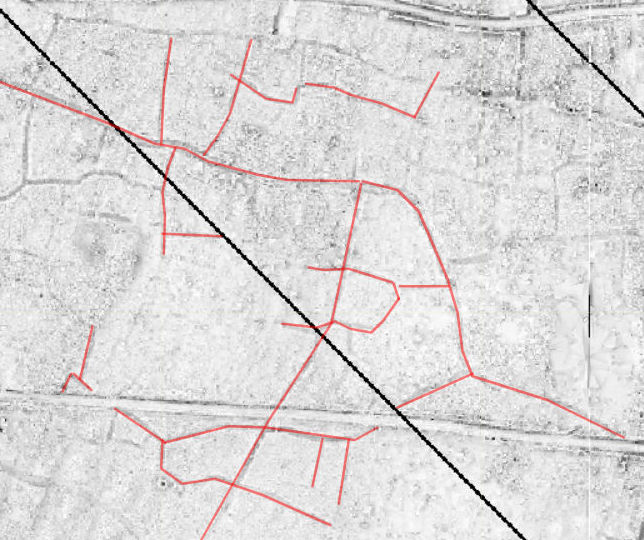
12. After drawing several more channels it is time to stop vectoring. To stop the vectoring go back to the Draw menu and select Cancel . This turns off the Polyline Draw tool and allows you to move around on the screen, edit the vectors (covered next), take a break, or save your work (this will be covered later).
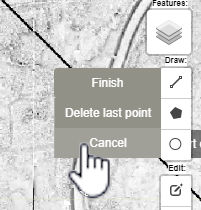
13. More vectors can be added to the existing map/drawing by simply repeating the steps above without clearing the drawing.
Practice:
To practice what you have been show in this section of the tutorial click on this link to open the Aleipata Map. If it comes up in a new TAB and not a SEPERATE window, simply drag the tab to the right to open it in a seperate window. You should now see the Tutorial and the Map on the screen at the same time. Try out the steps from the Tutorial on the Map. When you are finished simply close the Map without saving to return to the Tutorial.
[Back to Drawing/Editing Tools Menu ]
|
|
|
|
A2.
|
Polyline
Edit
|
1. Start as you did above by enlarging the section of the map that contains the archaeological features you wish to edit.
2. Click on the Edit tool from the Edit tools menu (left mouse click).
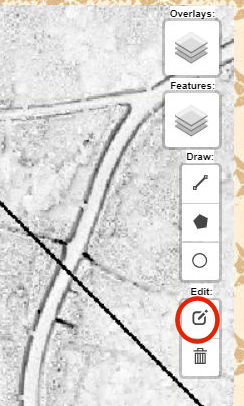
A menu appears. You can Cancel your selection or move the mouse to the left (onto the map) to begin. Move the mouse to the left.
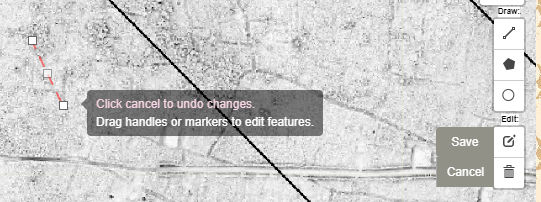
3. The edit points (white boxes) appear for all the vectors/lines that you have drawn.
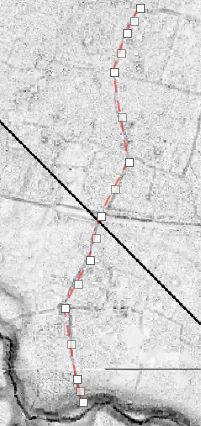
4. To move a point on the feature/vector:
a. move the mouse to the point you wish to move.
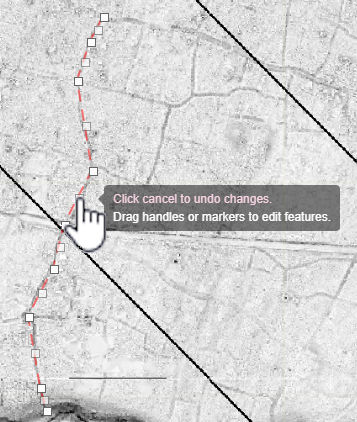
b. Click and drag the point to its new position. Release the mouse button to set the point in its new position. If it is an interior point 2 new points will be added to the line.
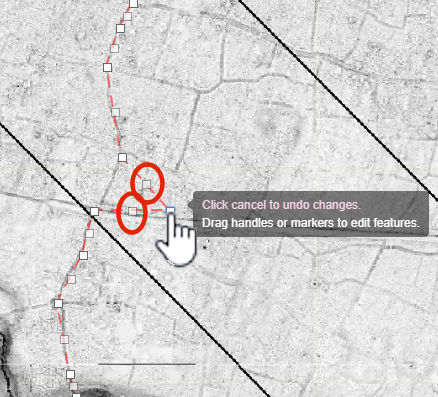
5. To make a vector longer or shorter, click and drag an endpoint.
6. To reduce the number of points in a vector click on one of the end points to delete it (all lines must have at least 3 points so this only works for a vector with 4 or more points.)
7. To add more edit points to the vector click the mouse on any internal point (not an end point) and 2 new points appear (one on either side of the selected point).
8. To cancel (remove) all changes since the last Save select Cancel . ALL changes not saved will be "undone" when Cancel is selected. There is NO WAY TO RETRIEVE CANCELED WORK.
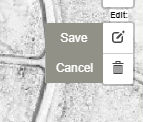
9. Use Save to save a change or changes. This saves the changes and allows you to make more changes by reselecting the Edit tool. It is a good idea to Save often as this will allow you to undo (Cancel) recent changes but not erase the ones you want to keep (have saved). Keep in mind, ALL changes not saved will be "undone" (lost) when Cancel is selected. There is NO WAY TO RETRIEVE REMOVED (CANCELED) WORK.

10. To Stop/Quit editing click Cancel BUT make sure to save any change with Save before you stop. ALL changes not saved will be "undone" when Cancel is selected.
Practice:
To practice what you have been show in this section of the tutorial click on this link to open the Aleipata Map. If it comes up in a new TAB and not a SEPERATE window, simply drag the tab to the right to open it in a seperate window. You should now see the Tutorial and the Map on the screen at the same time. Add some vectors to the Map (Tutorial A1) and try out the steps from this Tutorial on the Map. When you are finished simply close the Map without saving to return to the Tutorial.
[Back to Drawing/Editing Tools Menu ]
|
|
|
|
A3.
|
Polyline
Delete
|
1. We start by enlarging a section of the map so that the vectors (red lines) are plainly visible.

2. Click on the Delete tool  from the Edit tools menu (left mouse click). from the Edit tools menu (left mouse click).
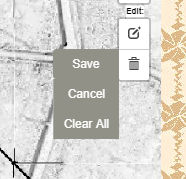
A menu appears. You can Cancel your selection or move the mouse to the left (onto the map) to begin. Move the mouse to the left.
3. A message appears, prompting you to "Click on a feature to remove". Move the mouse to the feature/vector you wish to remove. Notice the hand has changed from an open hand  to a pointer hand to a pointer hand  . Click the left mouse button to delete the feature. . Click the left mouse button to delete the feature.
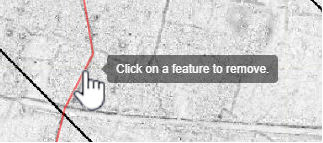
4. The feature/vector has been removed.
5. If you did not want to delete this feature/vector, immediately select Cancel from the Edit menu to return the feature.

6. If you are sure you want to permanently delete this feature select Save from the Edit menu to Save your change. Once a feature has been Deleted and Saved it CANNOT be retrieved.

The above steps can be repeated as many times as you wish to delete other features/vectors from your current work.
7. To permanently delete ALL the features/vectors on the map select Clear All . Once all the features have been Cleared they CANNOT be retrieved.

Practice:
To practice what you have been show in this section of the tutorial click on this link to open the Aleipata Map. If it comes up in a new TAB and not a SEPERATE window, simply drag the tab to the right to open it in a seperate window. You should now see the Tutorial and the Map on the screen at the same time. Add some vectors to the Map (Tutorial A1) and try out the steps from this Tutorial on the Map. When you are finished simply close the Map without saving to return to the Tutorial.
[Back to Drawing/Editing Tools Menu ]
|
|
|
|
B1.
|
Polygon
Draw
|
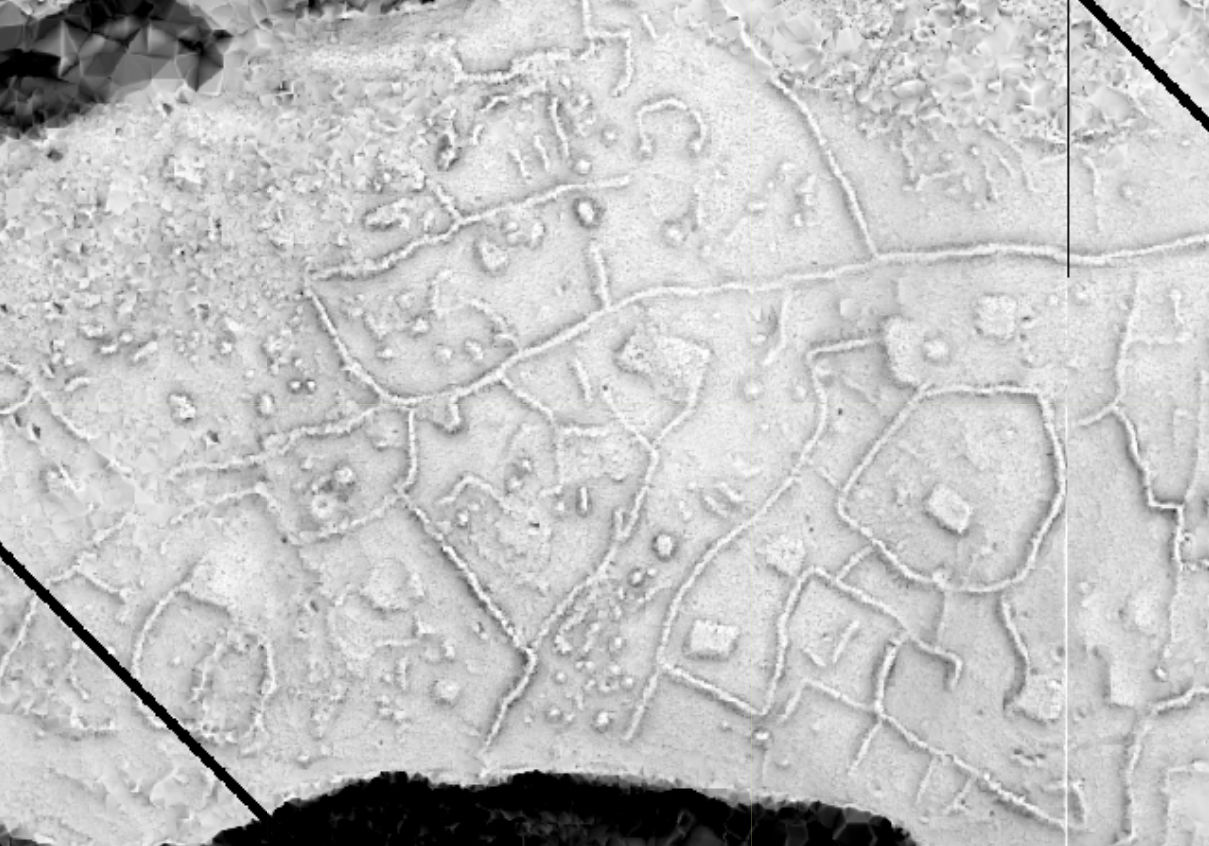
1. Start by enlarging a section of the map so that the archaeological features are plainly visible.
In this case, platforms.
2. Click on the Polygon tool from the Draw tools menu (left mouse click).
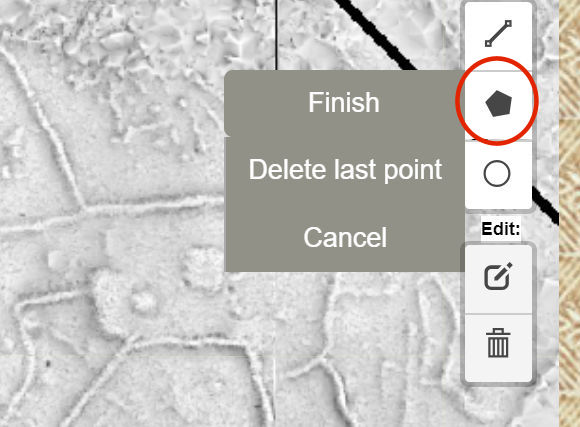
A menu appears. You can Cancel your selection or move the mouse to the left (onto the map) to begin. Move the mouse to the left.
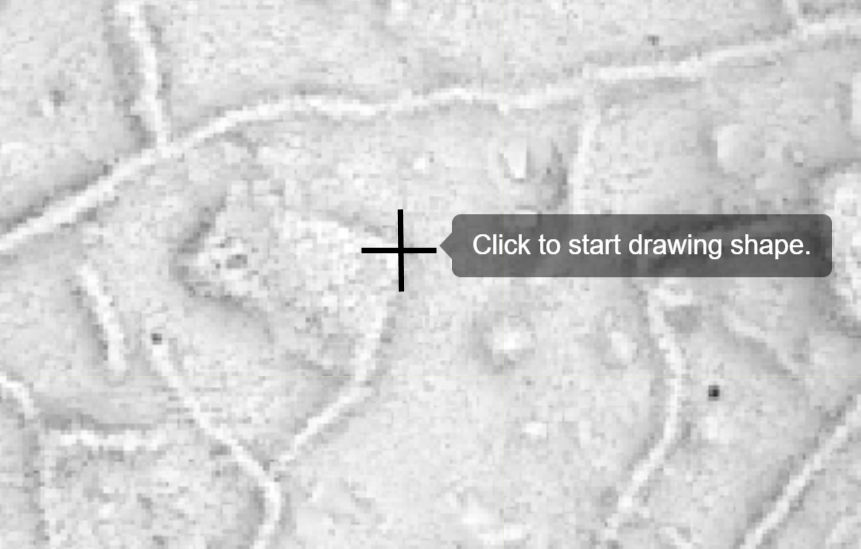
3. A message appears, with a "cross hair" + in front of it prompting you to start a drawing. Move the mouse to one of the corners of the platform you wish to record and click the left mouse button.
4. The first point (white square) appears on the screen with and a request to add another point. (Click to continue drawing shape.)
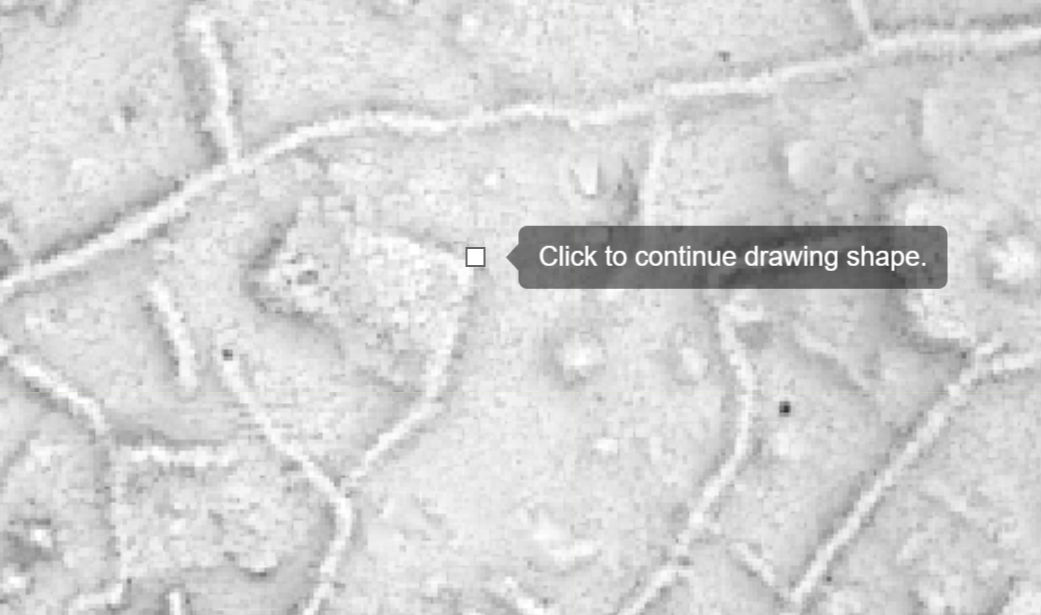
As you will be tracing the outside of the rectangular polygon that makes up the platform you will need to mark each corner.
5. Move the mouse to the next corner. Notice the purple squares behind the cross hair.
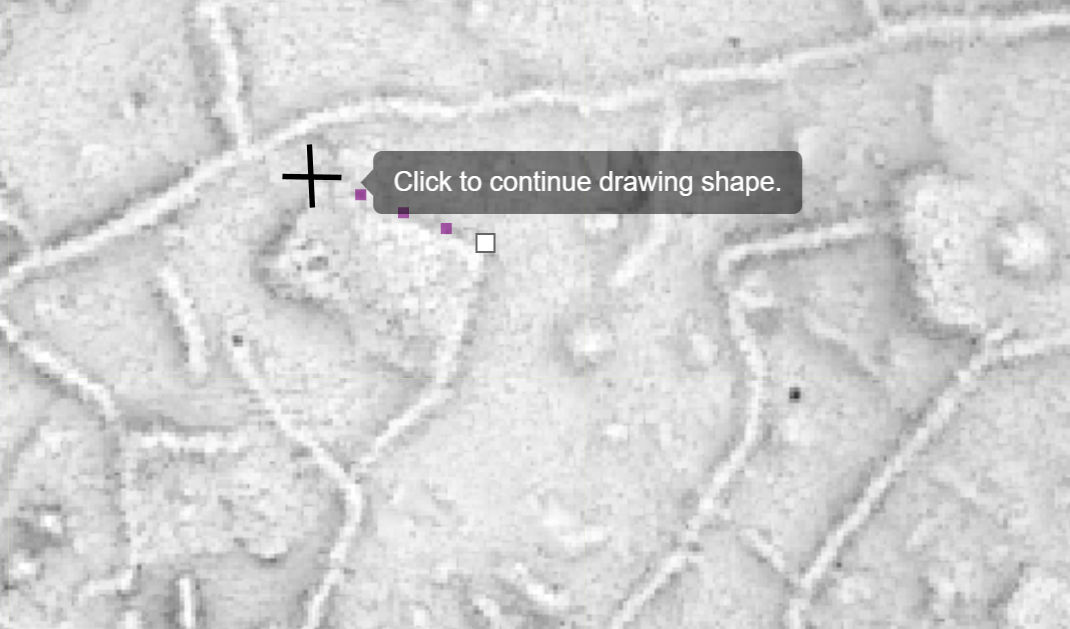
6. Click the mouse, a new point (white square) appears, followed by a solid purple line, and the message prompts you to continue.
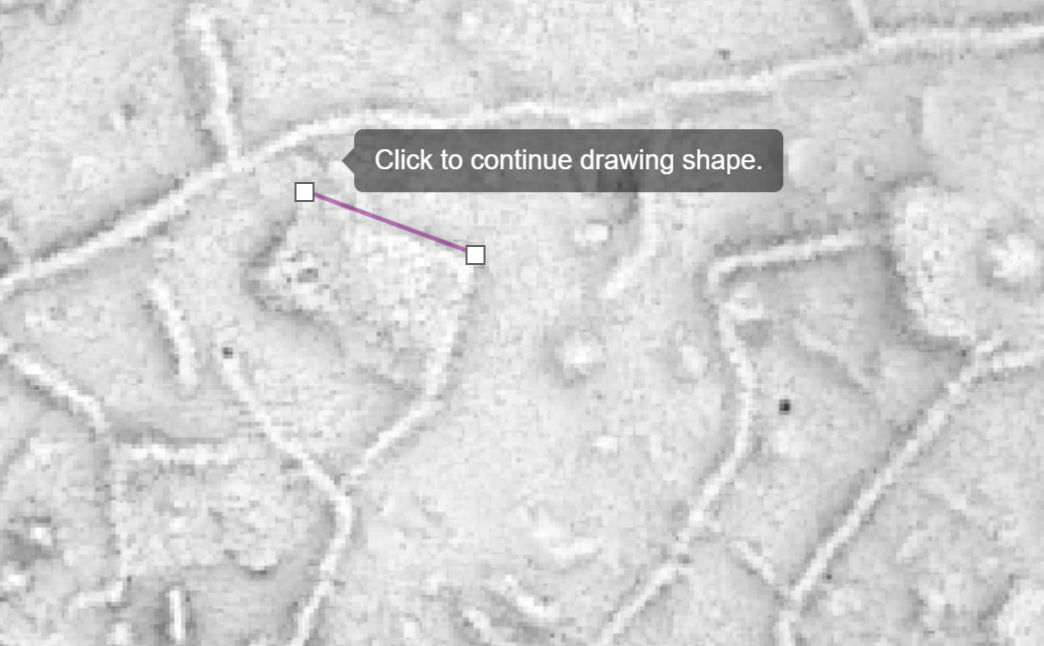
If you misplace a point it can be removed using Delete last point on the Polygon Draw menu.
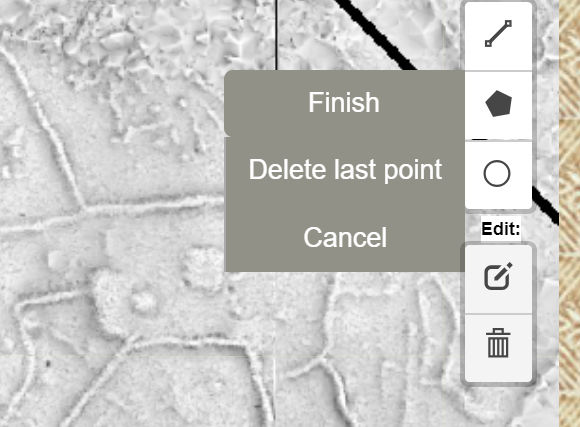
Continue moving along the outside of the platform, notice again the purple squares marking the line.
7. Click on the third corner. This time notice the purple triangle that forms. The prompt has changed to "Click first point to close this shape." All shapes (polygons) must have at least 3 sides.
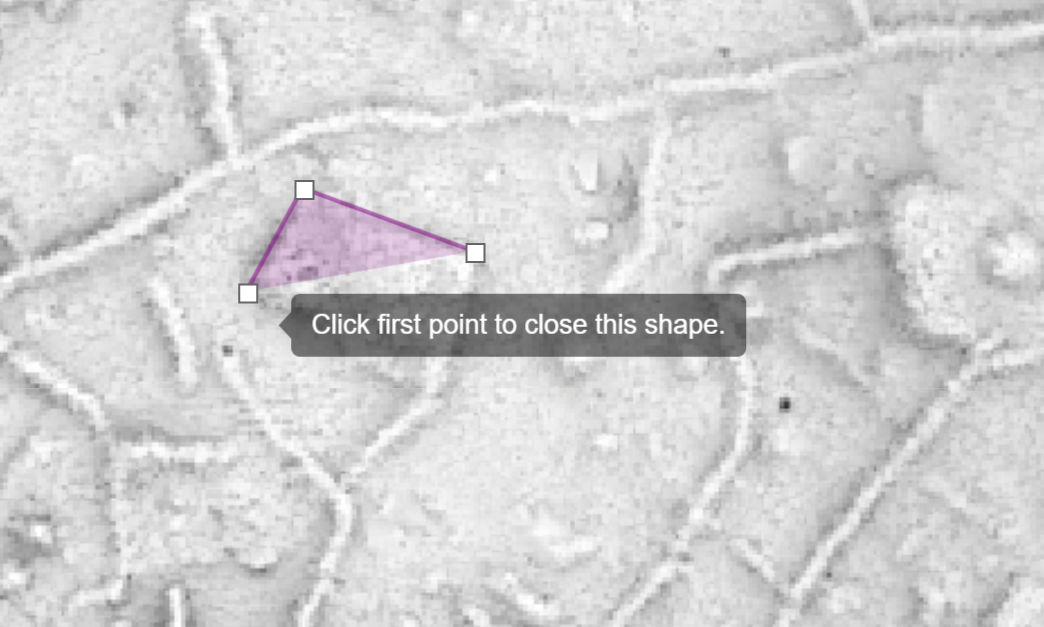
You are not ready to close your rectangular polygon yet, you have 2 more points to mark.
9. Move to the next corner and click the mouse. Notice the purple rectangle with one "open" side. You are prompted again to "Click first point to close this shape."
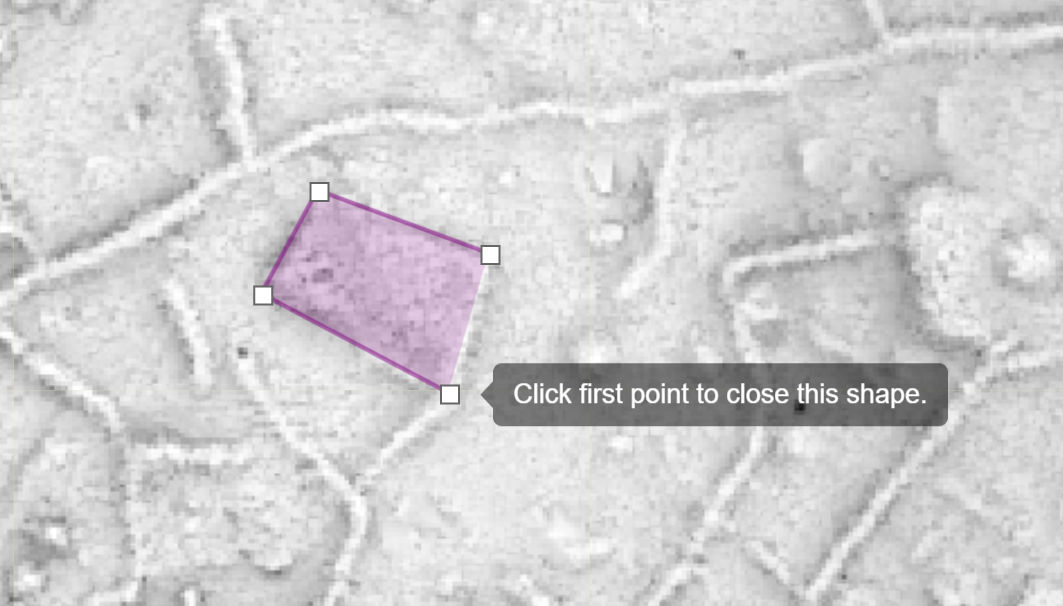
10. Click the "first point" (white square) to close the rectangle and finish marking this platform. The first polygon is complete and shows up as a light purple rectangle outlined in dark purple on the LiDAR image.
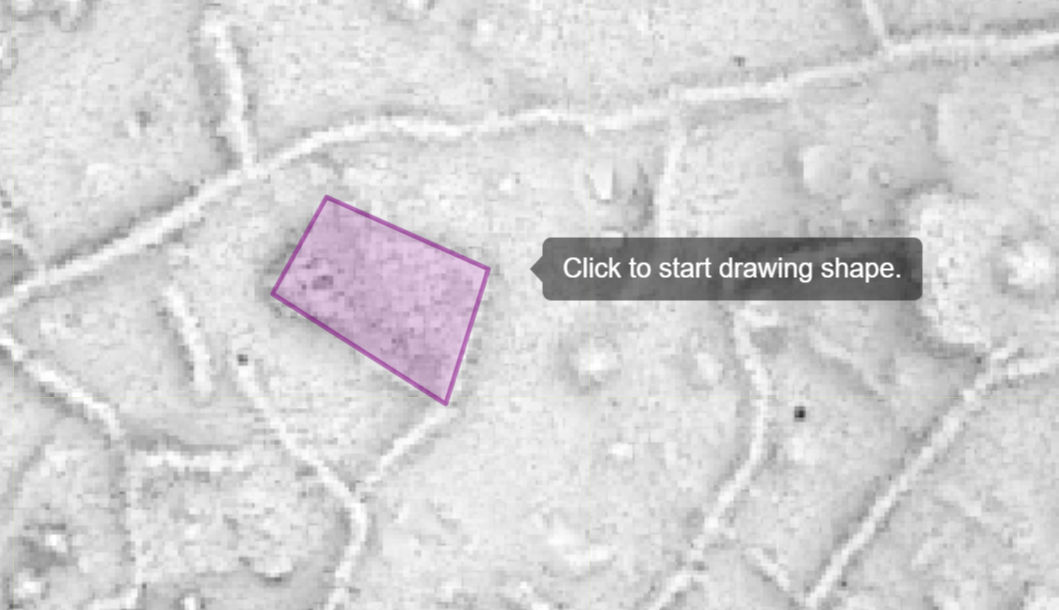
11. You can repeat the process above marking (vectoring) other platforms in the area.
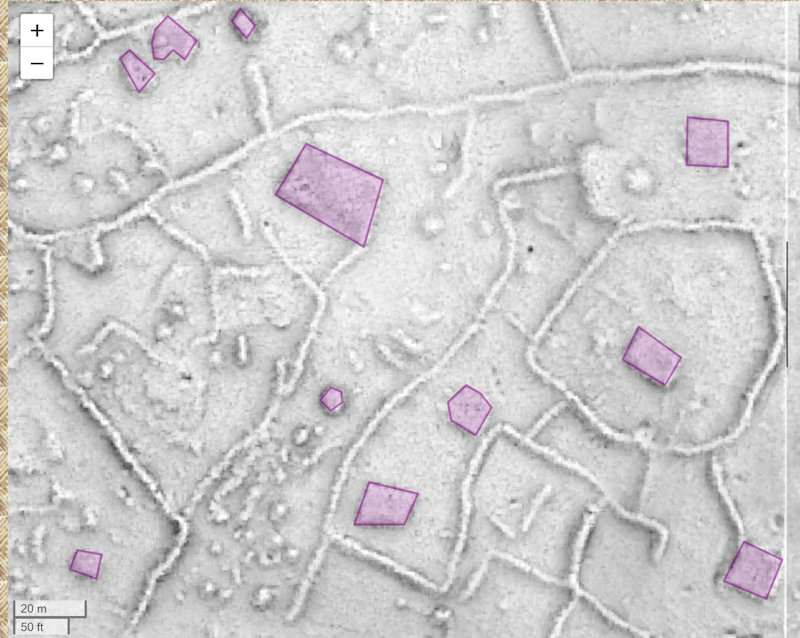
12. After drawing several more platforms it is time to stop vectoring. To stop the vectoring go back to the Polygon Draw menu and select Cancel . This turns off the Polyline Draw tool and allows you to move around on the screen, edit the vectors (covered next), take a break, or save your work (this will be covered later).

12. More vectors can be added to the existing map/drawing by simply repeating the steps above without clearing the drawing.
Practice:
To practice what you have been show in this section of the tutorial click on this link to open the Aleipata Map. If it comes up in a new TAB and not a SEPERATE window, simply drag the tab to the right to open it in a seperate window. You should now see the Tutorial and the Map on the screen at the same time. Try out the steps from this Tutorial on the Map. When you are finished simply close the Map without saving to return to the Tutorial.
[Back to Drawing/Editing Tools Menu ]
|
|
|
|
B2.
|
Polygon
Edit
|
1. Start as you did above by enlarging the section of the map that contains the archaeological features you wish to edit.
2. Just as above, click on the Edit tool from the Edit tools menu (left mouse click).
The same menu appears that you used with the Polyline. You can again Cancel your selection or move the mouse to the left (onto the map) to begin. Move the mouse to the left.
3. The edit points (white boxes) appear for all the vectors/lines that you have drawn.
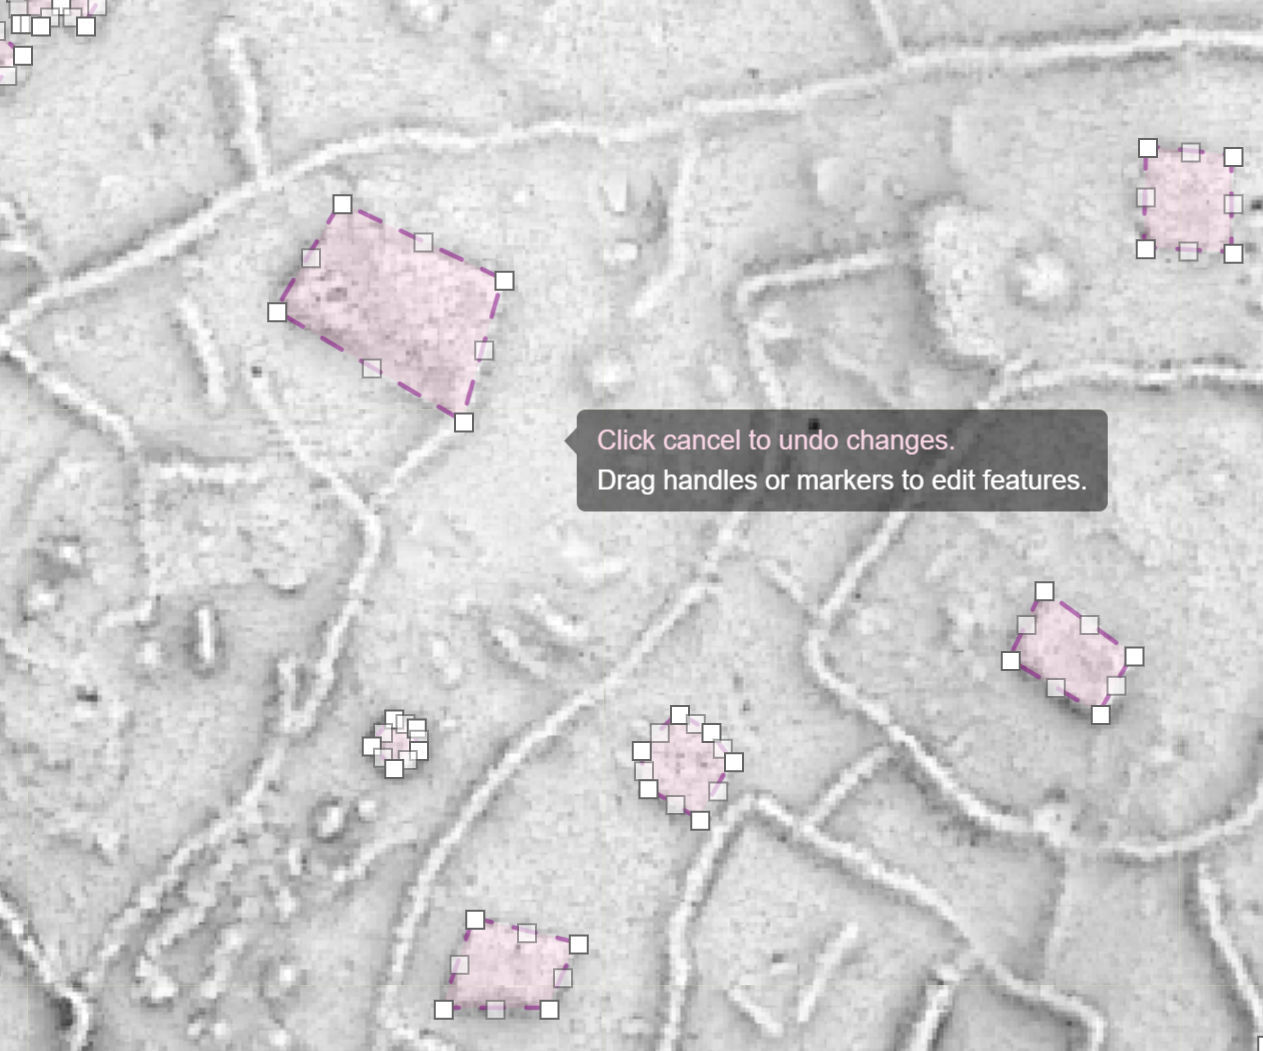
Polygon Edit works very much like Polyline Edit. The tuorial that follows will only cover those things that are different.
4. Clicking any white point/box erases it and the 2 gray points on either side of it.
5. A gray point/box may be dragged to fill the place of a deleted white point/box to reform the shape.
6. Any point (white or gray) may be clicked and dragged to a new location.
7. Dragging a white point moves the gray points on either side of it.
8. The distance between white and gray points can be changed by dragging the white point along the dashed line toward or away from a gray point.
9. When moved, a gray point adds 2 new points (one on either side of the gray point, and the moved gray point then turns white).
10. When moved, white points do not add "additional" points to the vector/polygon (but as per 7 they do move the 2 gray points, one on either side of the white point, with them).
Practice:
To practice what you have been show in this section of the tutorial click on this link to open the Aleipata Map. If it comes up in a new TAB and not a SEPERATE window, simply drag the tab to the right to open it in a seperate window. You should now see the Tutorial and the Map on the screen at the same time. Add some vectors to the Map (Tutorial B1) and try out the steps from this Tutorial on the Map. When you are finished simply close the Map without saving to return to the Tutorial.
[Back to Drawing/Editing Tools Menu ]
|
|
|
|
B3.
|
Polygon
Delete
|
1. Start again by enlarging a section of the map so that the vectors (purple lines outlining the purple shapes) are plainly visible.

2. Click on the Delete tool  from the Edit tools menu (left mouse click). from the Edit tools menu (left mouse click).

A menu appears. You can Cancel your selection or move the mouse to the left (onto the map) to begin. Move the mouse to the left.
3. Just as before, a message appears, prompting you to "Click on a feature to remove". Move the mouse to the feature/vector you wish to remove. Notice the hand has changed from an open hand  to a pointer hand to a pointer hand  . Click the left mouse button to delete the feature. . Click the left mouse button to delete the feature.
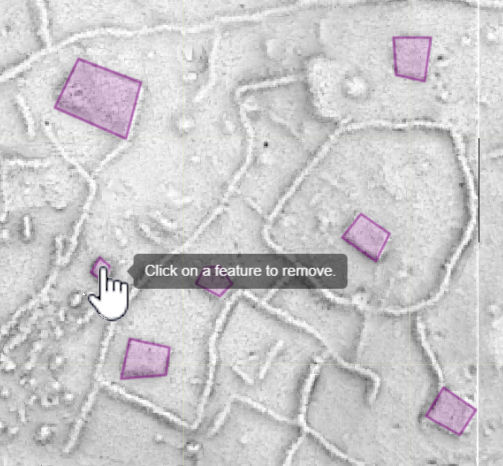
4. The feature/vector has been removed.
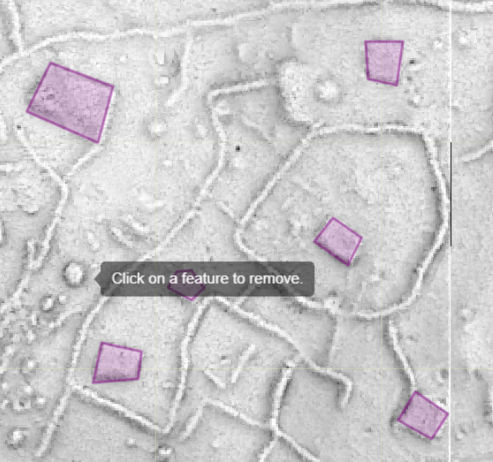
5. If you did not want to delete this feature/vector, immediately select Cancel from the Edit menu to return the feature.

6. If you are sure you want to permanently delete this feature select Save from the Edit menu to Save your change. Once a feature has been Deleted and Saved it CANNOT be retrieved.

The above steps can be repeated as many times as you wish to delete other features/vectors from your current work.
7. To permanently delete ALL the features/vectors on the map select Clear All . Once all the features have been Cleared they CANNOT be retrieved.

Practice:
To practice what you have been show in this section of the tutorial click on this link to open the Aleipata Map. If it comes up in a new TAB and not a SEPERATE window, simply drag the tab to the right to open it in a seperate window. You should now see the Tutorial and the Map on the screen at the same time. Add some vectors to the Map (Tutorial B1) and try out the steps from this Tutorial on the Map. When you are finished simply close the Map without saving to return to the Tutorial.
[Back to Drawing/Editing Tools Menu ]
|
|
|
|
C1.
|
Circle
marker
Draw
|
1. We start by enlarging a section of the map so that the archaeological features are plainly visible. In this case, earth ovens.
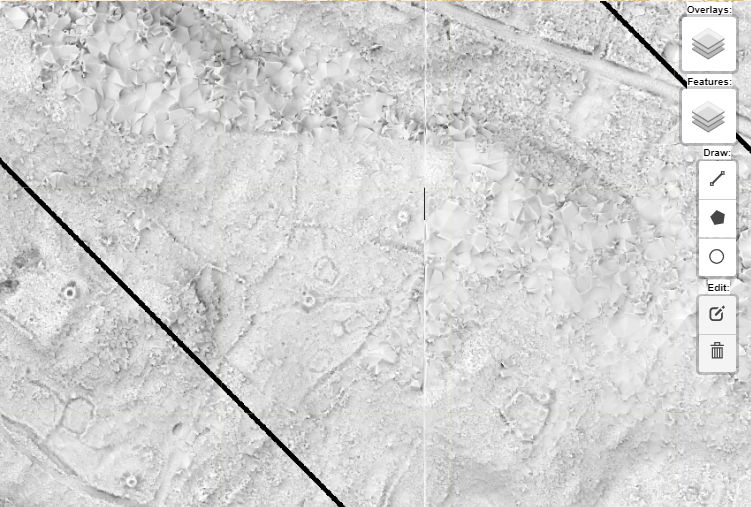
2. Click on the Circlemarker tool from the Draw tools menu (left mouse click).
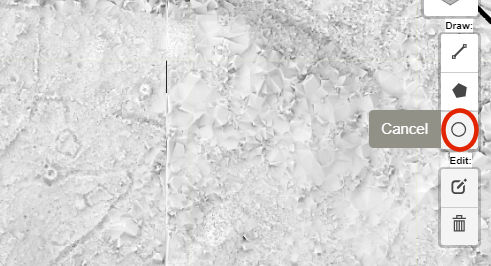
A menu appears. You can Cancel your selection or move the mouse to the left (onto the map) to begin. Move the mouse to the left.
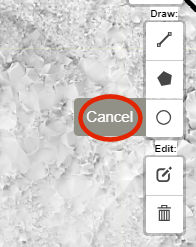
3. A message appears, prompting you to "Click map to place circle marker". Move the mouse over the feature you wish to record (earth oven) and click the left mouse button.
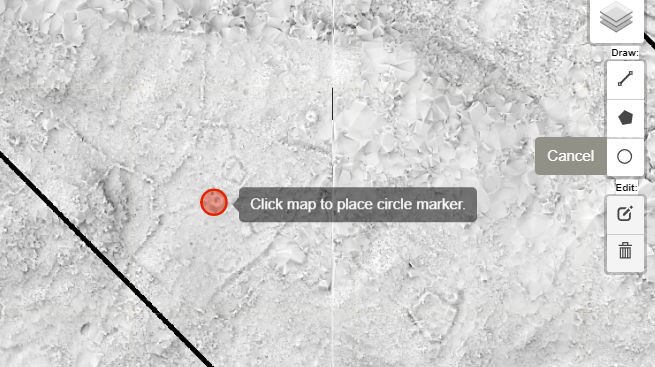
4. The first earth oven has been marked. You are prompted to mark another.
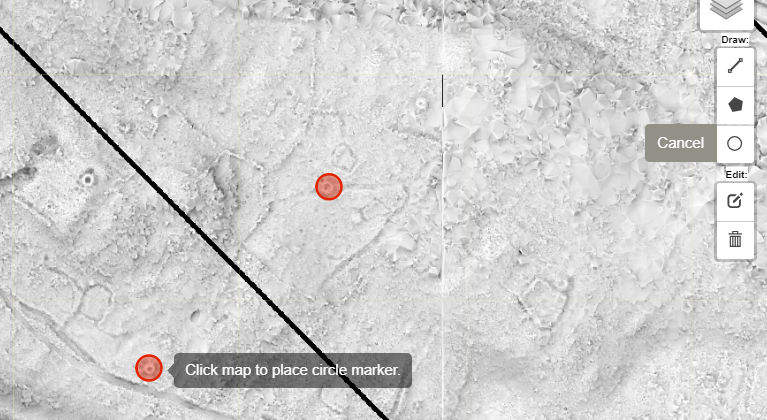
5. Repeat the process for the other earth ovens in the area.
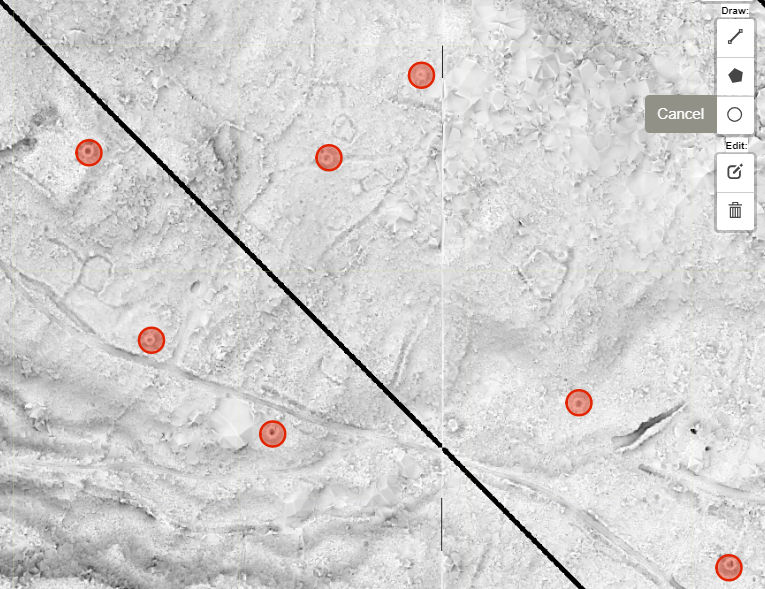
6. After marking several more earth ovens it is time to stop vectoring. To stop the vectoring go back to the Draw menu and select Cancel . This turns off the Circlemarker tool and allows you to move around on the screen, edit the vectors (covered next), take a break, or save your work (this will be covered later)
Practice:
To practice what you have been show in this section of the tutorial click on this link to open the Aleipata Map. If it comes up in a new TAB and not a SEPERATE window, simply drag the tab to the right to open it in a seperate window. You should now see the Tutorial and the Map on the screen at the same time. Add some vectors to the Map (Tutorial B1) and try out the steps from this Tutorial on the Map. When you are finished simply close the Map without saving to return to the Tutorial.
[Back to Drawing/Editing Tools Menu ]
|
|
|
|
C2.
|
Circle
marker
Edit
|
1. Start as you did above by enlarging the section of the map that contains the archaeological features you wish to edit.
2. Just as above, click on the Edit tool from the Edit tools menu (left mouse click).
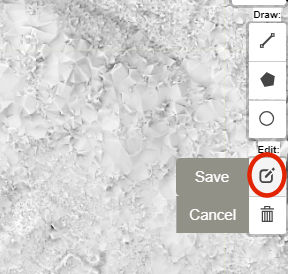
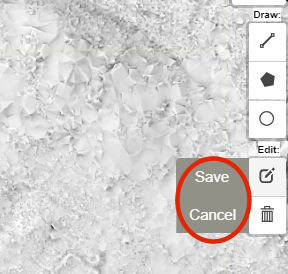
As this tool has less options a shorter menu appears that you used above. You can again Cancel your selection or move the mouse to the left (onto the map) to begin. Move the mouse to the left.
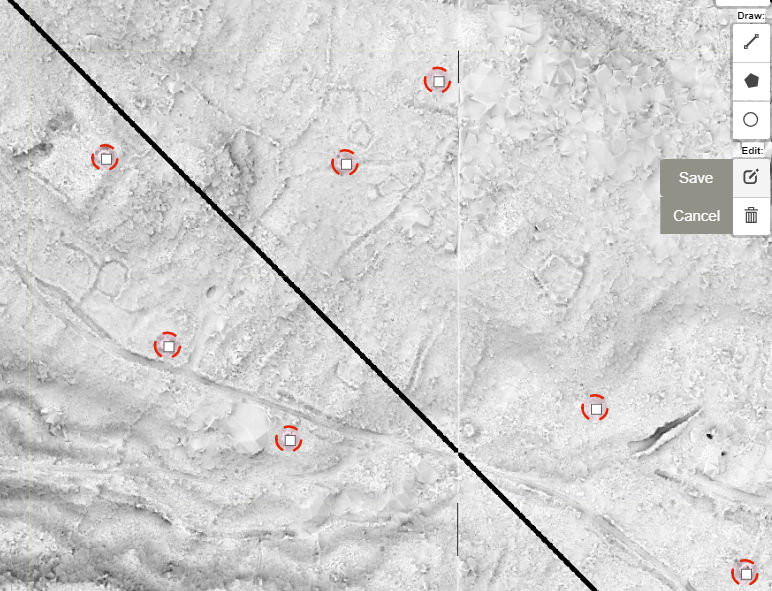
3. The edit points (white boxes surrounded by red dashes) appear for all the vectors that you have drawn.
4. A message appears, prompting you to "Drag handles or markers to edit features". Move the mouse to the feature/vector you wish to move. Notice the hand has changed from an open hand  or pointer hand or pointer hand  to 4 arrows to 4 arrows  . Click the left mouse button to edit the feature marker (move it to another location). . Click the left mouse button to edit the feature marker (move it to another location).
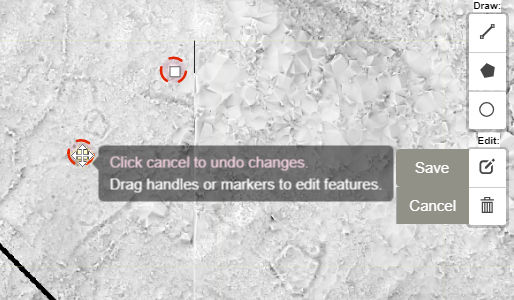
5. After moving the vector select Cancel from the Edit menu to return the feature to its original location or select Save from the Edit menu to save the change.
6. The above steps can be repeated as many times as you wish to move other features/vectors from your current work.
Practice:
To practice what you have been show in this section of the tutorial click on this link to open the Aleipata Map. If it comes up in a new TAB and not a SEPERATE window, simply drag the tab to the right to open it in a seperate window. You should now see the Tutorial and the Map on the screen at the same time. Add some vectors to the Map (Tutorial B1) and try out the steps from this Tutorial on the Map. When you are finished simply close the Map without saving to return to the Tutorial.
[Back to Drawing/Editing Tools Menu ]
|
|
|
|
C3.
|
Circle
marker
Delete
|
1. We start by enlarging a section of the map as before so that the vectors (red circles) are plainly visible.
2. Click on the Delete tool  from the Edit tools menu (left mouse click). from the Edit tools menu (left mouse click).
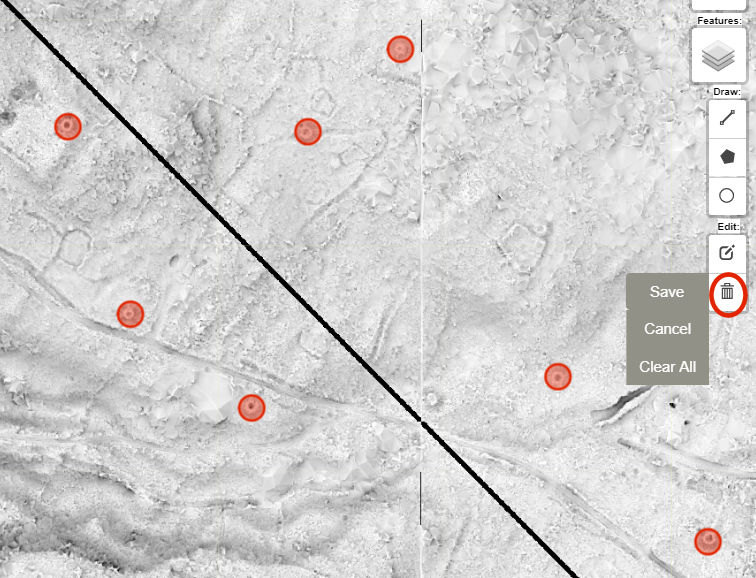
A menu appears. You can Cancel your selection or move the mouse to the left (onto the map) to begin. Move the mouse to the left.
3. A message appears, prompting you to "Click on a feature to remove". Move the mouse to the feature/vector you wish to remove. Notice the hand has changed from an open hand  to a pointer hand to a pointer hand  . Click the left mouse button to delete the feature. . Click the left mouse button to delete the feature.
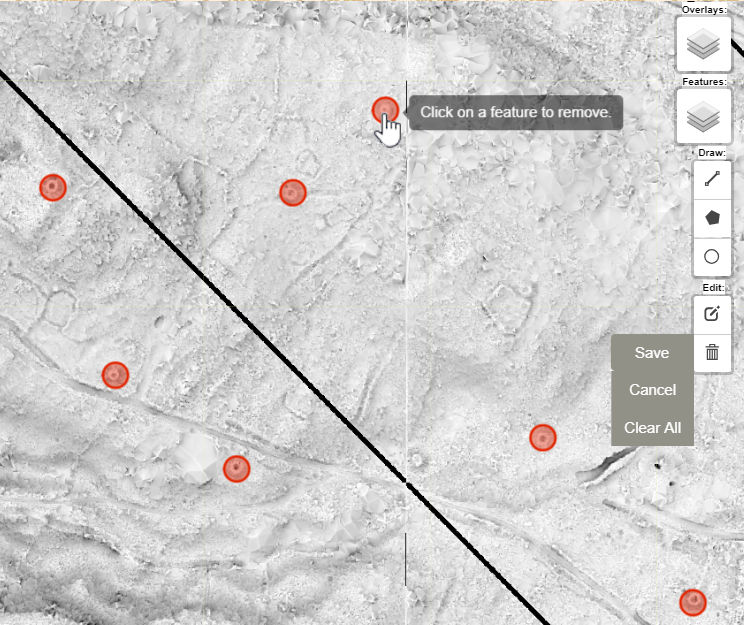
4. The feature/vector has been removed.
5. If you did not want to delete this feature/vector, immediately select Cancel from the Edit menu to return the feature.

6. If you are sure you want to permanently delete this feature select Save from the Edit menu to Save your change. Once a feature has been Deleted and Saved it CANNOT be retrieved.

The above steps can be repeated as many times as you wish to delete other features/vectors from your current work.
7. To permanently delete ALL the features/vectors on the map select Clear All . Once all the features have been Cleared they CANNOT be retrieved.

Practice:
To practice what you have been show in this section of the tutorial click on this link to open the Aleipata Map. If it comes up in a new TAB and not a SEPERATE window, simply drag the tab to the right to open it in a seperate window. You should now see the Tutorial and the Map on the screen at the same time. Add some vectors to the Map (Tutorial A1) and try out the steps from this Tutorial on the Map. When you are finished simply close the Map without saving to return to the Tutorial.
[Back to Drawing/Editing Tools Menu ]
|
|
|
|